Call us: (302) 907-2662 Email : info@moparpartsdealers.com


Mopar 4891832AB Pump-Air
$313.50
- Part Description
Pump Air
- Replaces
- Manufacturer
Mopar
-
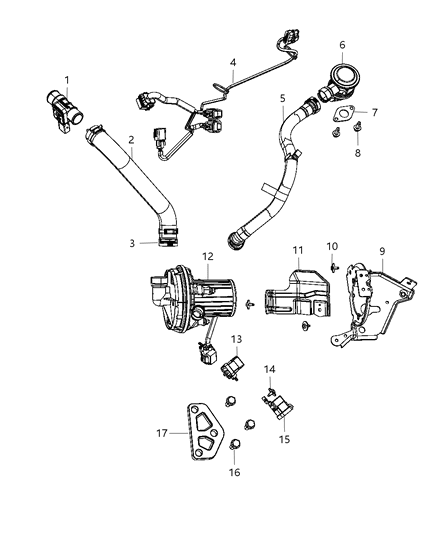
4891832AB Pump-Air is Ref No. 12 in the diagram below
-
 Bracket-Air Pump
4891831AB
-
 Coupler
68188366AA
-
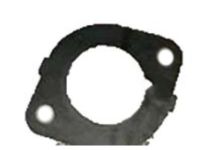 Gasket
4591971AA
-
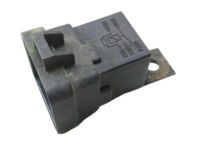 Relay
Relay56007080AB
-
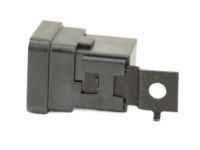 Relay And Bracket
56007078AB
-
 Screw-HEXAGON FLANGE Head
6508489AA
-
 Screw-HEXAGON Head
6508109AA
-
-
Product Specifications
Brand Genuine Mopar Manufacturer Part Number 4891832AB Part Description Pump Air Other Names A.I.R. Pump Item Dimensions 10.4 x 6.4 x 6.6 inches Item Weight 4.30 Pounds Condition New Replaces 4891832AA Manufacturer Mopar SKU 4891832AB Warranty This genuine Mopar part is guaranteed by Mopar’s factory warranty. Shipping & Return Shipping Policy Return Policy Warning: California’s Proposition 65 -
Vehicle Fitment
Year Make Model Engine Important vehicle option details 2011-2014 Chrysler 200 4 Cyl 2.4L Limited Sedan, LX Sedan, Touring Convertible, Touring Sedan 2008-2010 Chrysler Sebring 4 Cyl 2.4L Limited Sedan, LX Sedan, Touring Sedan 2008-2014 Dodge Avenger 4 Cyl 2.4L Express, Heat, LUX, Mainstreet, R/T FWD, SE, SXT 2009-2010 Dodge Journey 4 Cyl 2.4L SE FWD, SXT FWD -
Customer Questions & Expert Answers
- Q:
Is this part guaranteed to fit my truck ?Posted by MoparPartsGiant Specialist
- A:
You can Select Your Vehicle to check if 4891832AB fits your vehicle.
Posted by moparpartsdealers Specialist
- Q:
How to Remove and Install an Air Injection Pump and Check Valve on Dodge Avenger?Posted by Customer
- A:
Disconnect the negative battery cable from the remote ground terminal or battery. Remove the engine cover. The air injection pump is located behind the left end of the engine, above the rear portion of the transaxle case. Remove the Powertrain Control Module (PCM) and the PCM mounting bracket. Detach the tubes from the air pump by squeezing the collars of the quick-connect fittings. Raise the vehicle and support it securely on jackstands. Remove the bolt securing the air pump relay to the pump and reposition the heat shield. Lower the vehicle and remove the heat shield upper mounting bolt. Detach the shield. Disconnect the electrical connector from the air pump, remove the three mounting bolts, and detach the air pump from its bracket. Installation is the reverse of the removal procedure. Disconnect the air hose from the Secondary Air Injection Check Valve. Remove the Secondary Air Injection Check Valve mounting bolts and detach the valve from the exhaust manifold pipe. Clean the exhaust manifold pipe flange and the Secondary Air Injection Check Valve flange. Installation is the reverse of removal. Be sure to use a new gasket and tighten the bolts to the torque.
Posted by moparpartsdealers Specialist
- Q:
How to Remove and Install an Air Injection Pump and Check Valve on Chrysler Sebring?Posted by Customer
- A:
Disconnect the negative battery cable from the remote ground terminal or battery. Remove the engine cover. The air injection pump is located behind the left end of the engine, above the rear portion of the transaxle case. Remove the Powertrain Control Module (PCM) and the PCM mounting bracket. Detach the tubes from the air pump by squeezing the collars of the quick-connect fittings. Raise the vehicle and support it securely on jackstands. Remove the bolt securing the air pump relay to the pump and reposition the heat shield. Lower the vehicle and remove the heat shield upper mounting bolt. Detach the shield. Disconnect the electrical connector from the air pump, remove the three mounting bolts, and detach the air pump from its bracket. Installation is the reverse of the removal procedure. Disconnect the air hose from the Secondary Air Injection Check Valve. Remove the Secondary Air Injection Check Valve mounting bolts and detach the valve from the exhaust manifold pipe. Clean the exhaust manifold pipe flange and the Secondary Air Injection Check Valve flange. Installation is the reverse of removal. Be sure to use a new gasket and tighten the bolts to the torque.
Posted by moparpartsdealers Specialist
- Q:
How to Remove the Vacuum Pump on Chrysler Sebring?Posted by Customer
- A:
2015 and later models are equipped with either a mechanical or electric brake vacuum pump. The mechanical pump is driven by the rear end of the camshaft and mounted on the left end of the cylinder head on 2.4L engines, and the electric pump on 3.6L engines is located at the left side of the engine and secured to a bracket by two mounting bolts. Disconnect the cable from the negative battery terminal. Be careful not to damage the plastic vacuum pump hose connector fitting. Also, oil may leak from the pump so be sure to have plenty of rags ready to soak up spills. Remove the engine cover, then disconnect the quick-connect hose fitting from the pump. Remove the vacuum pump mounting bolts, then carefully separate the pump from the cylinder head. Discard the old O-ring seals. Remove the retaining screw and separate the plastic connector piece from the pump. Check and replace the O-ring on the fitting, if necessary.
Posted by moparpartsdealers Specialist
- Q:
How to Remove and Install an Air Injection Pump and Check Valve on Chrysler 200?Posted by Customer
- A:
Disconnect the negative battery cable from the remote ground terminal or battery. Remove the engine cover. The air injection pump is located behind the left end of the engine, above the rear portion of the transaxle case. Remove the Powertrain Control Module (PCM) and the PCM mounting bracket. Detach the tubes from the air pump by squeezing the collars of the quick-connect fittings. Raise the vehicle and support it securely on jackstands. Remove the bolt securing the air pump relay to the pump and reposition the heat shield. Lower the vehicle and remove the heat shield upper mounting bolt. Detach the shield. Disconnect the electrical connector from the air pump, remove the three mounting bolts, and detach the air pump from its bracket. Installation is the reverse of the removal procedure. Disconnect the air hose from the Secondary Air Injection Check Valve. Remove the Secondary Air Injection Check Valve mounting bolts and detach the valve from the exhaust manifold pipe. Clean the exhaust manifold pipe flange and the Secondary Air Injection Check Valve flange. Installation is the reverse of removal. Be sure to use a new gasket and tighten the bolts to the torque.
Posted by moparpartsdealers Specialist
- Q:
Related products
-

Mopar 68005184AA Egr Valve Gasket
$12.44 -

Mopar 68239633AA Pump-Air
$312.40 -

Mopar 53034192AB Valve-EGR
$285.55 -

Mopar 68210505AA Egr Cooler Gasket
$50.62
Reviews
There are no reviews yet.